 Glenn K!'s Chain Mail Page
 Glenn K!'s Chain Mail Page
And be sure to check out what's probably the ultimate list of chainmail links on the web - Sara's Chainmail Connection.


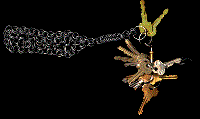
This is a rather simple keychain I made (ok, it's the third one of these
that I've made). See how shiny this one is? That's because I'm using a
different kind of wire than I used for the piece above. On a side note,
the diamond shaped part of the piece is made of a pattern called 4-link
for those of you unfamiliar with chain mail, and the part linking the
diamond shaped part and the key ring is a pattern called the box pattern.
Total Time: 1 1/2 hours

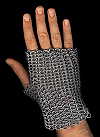
This is my largest peice so far. I've had people try to convince me to
start selling at rennaiscance festivals because of this one.
I can't imagine why. It's not all that good.
Once again,
it's using the shinier wire, though it's still somewhat tarnished by
wearing it around town and to shows and such. It is also constructed
using a 4-link pattern.
Total Time: around 20 hours, but it's hard to say


This is the best peice I've made. It's a pretty cool little belt which
uses mostly 4-link in the design. The belt strap and buckle, etc are all
custom made by me for the belt. Ok, so I took the buckle off an old belt
from the Salvation Army. Unfortunately, it's too small for me, which I
suppose is alright because I didn't make it for me.
Total Time: around 15 hours, including leather work
It's actually not all that difficult. Same as all things - a series of
different steps.


Notes:
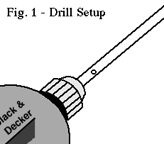
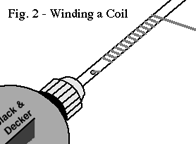
Please note that most chainmail folks dislike my methods. There are two
main reasons why. Use of the drill tends to create a lot more wasted wire
than used of a manually cranked mandril (it can also wear out a drill if
you're not careful).
Also, by using the end-snips that I have, the ends of the links are
somewhat rough and tend to snag finer fabrics and such. If you take a
look at any of the close-up images above, you can see this quite
clearly. The trick is that I do nothing to correct this. I could
weld them if I were anal enough, or file them if I were anal enough.
But I'm only a hobbyist, not a tradesman or shooting for historical
accuracy. This is the main reason I don't consider any of my pieces to be
high quality.

 This
Armourers Ring
site is owned by
 Glenn K! . Want to join the Armourers Ring ? |
|---|
| [Skip Prev] [Prev] [Next] [Skip Next] [Random] [Next 5] [List Sites] |
Please note that I am in most cases fundamentally opposed to web rings since they're run by central sites which farm magic-cookies and are able to track your movements across the web. However, as this is a privately-held web ring, I'll tolerate it just this once....
 Back to Glenn K!'s Home Page